


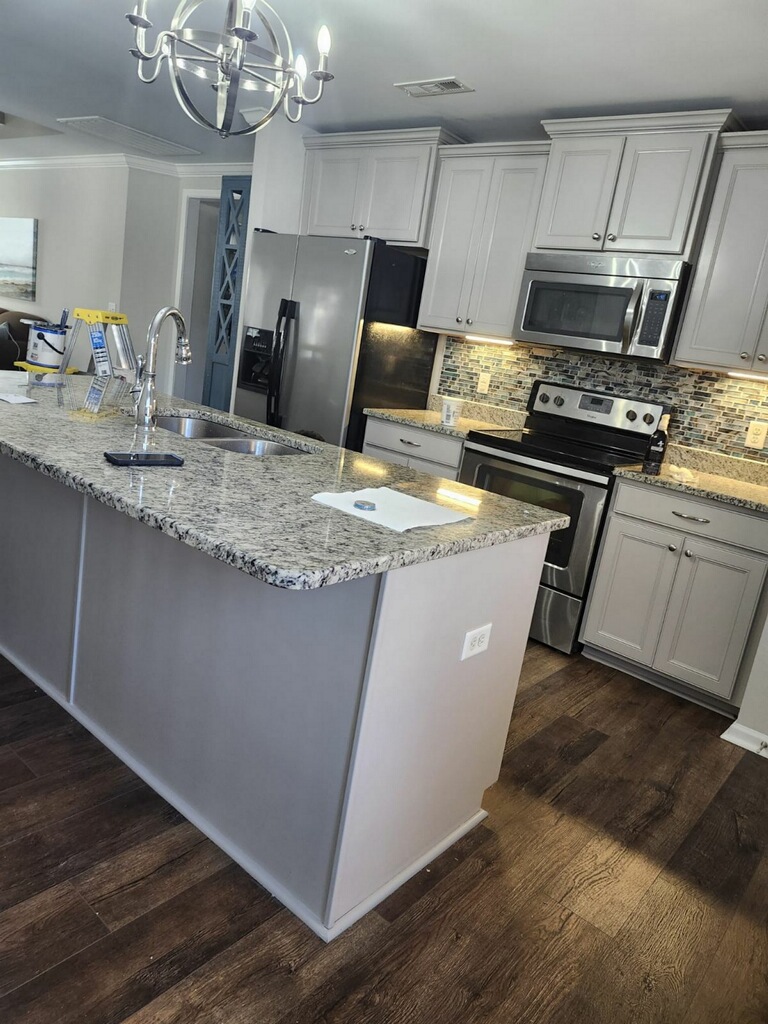
If your kitchen cabinets look dated but the cabinet boxes are still in good shape, you don’t need to replace them. Cabinet painting offers Nashville homeowners a cost-effective way to refresh their kitchen without the expense of a full remodel. With the right prep work, quality paint products, and proper techniques, you can transform your kitchen cabinets and save over $10,000 compared to replacement.
“Kitchens command a huge share of renovation spending: the Joint Center for Housing Studies of Harvard University projects U.S. homeowners will spend around $522 billion on improvements by the end of 2026 – and the kitchen routinely leads the list, which is exactly why a few thousand dollars of cabinet paint can outperform a five-figure tear-out.”
— Joint Center for Housing Studies of Harvard University, 2026 LIRA
This guide covers everything Nashville homeowners need to know about painting kitchen cabinets, from choosing the best paint and finish for Tennessee’s climate to understanding the process and costs involved.
Why Paint Kitchen Cabinets Instead of Replacing Them
Painting your kitchen cabinets is one of the smartest investments you can make in your Nashville home. Most cabinets are built to last decades, and if your cabinet doors and drawer fronts are structurally sound, there’s no reason to replace them. A fresh coat of paint can dramatically transform the overall aesthetic of your kitchen, making it feel more modern and inviting.
Beyond the financial savings, painting cabinets allows homeowners to retain their existing cabinetry, reducing waste and promoting sustainability in home renovations. You’re also able to complete the project in a fraction of the time it would take to install new cabinets, with less disruption to your daily life.
[A quick decision path to settle whether your cabinets are worth painting or better off replaced.]
Cabinet Painting Cost in Nashville: DIY vs. Professional vs. Replacement
Understanding the cost differences helps Nashville homeowners make informed decisions about their cabinet painting project.
DIY Cabinet Painting Costs
If you decide to paint your own kitchen cabinets, expect to spend $200 to $600 on materials. You’ll need primer, paint, brushes or a paint sprayer, sandpaper, painter’s tape, a tack cloth, wood filler, and cleaning supplies. However, DIY projects often take much longer than expected and can result in brush strokes, drips, or uneven coverage if you lack experience.
Professional Cabinet Painting Costs in Nashville
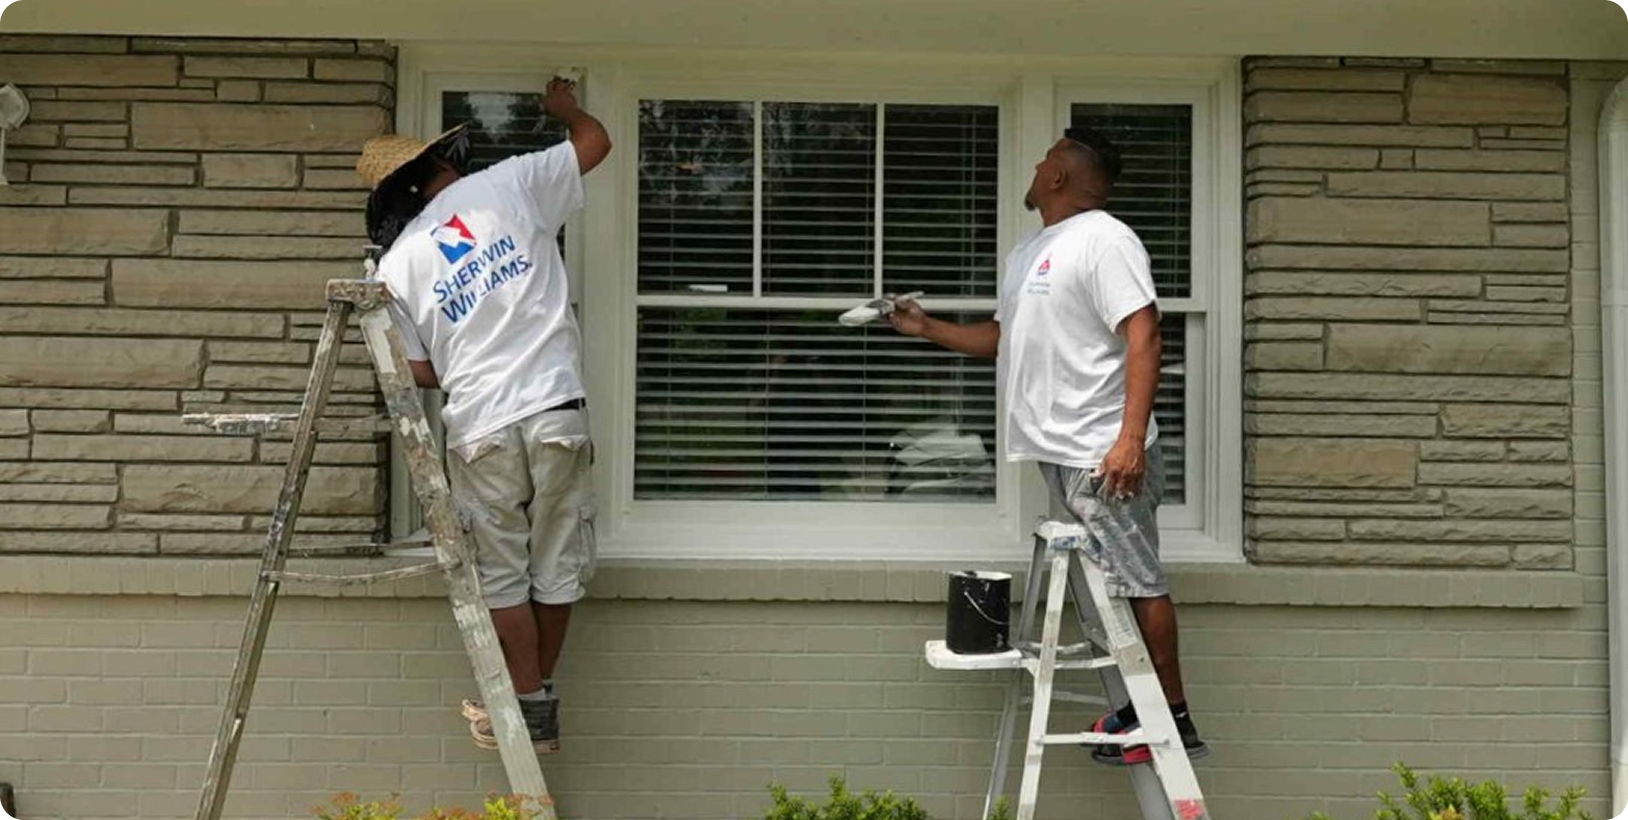
Professional painters in Nashville typically charge between $3,000 and $8,000 for kitchen cabinet painting, depending on the size of your kitchen and the condition of your surfaces. This cost includes proper surface preparation, multiple coats of primer and paint, and a durable finish that will last for years. Professional painters bring the expertise to avoid common mistakes and deliver a flawless finish that increases your home’s value.
Cabinet Replacement Costs
Full cabinet replacement in Nashville ranges from $15,000 to $40,000 or more, depending on the materials and kitchen size. When you factor in demolition, disposal, and installation time, replacement becomes a major investment that most homeowners don’t need to make if their existing cabinetry is in good condition.
[The three paths for a Nashville kitchen, side by side, from cheapest to most expensive.]
For most Nashville homeowners, professional cabinet refinishing offers the best balance of quality, cost, and convenience.
Best Paint and Finish for Kitchen Cabinets in Tennessee’s Climate
Tennessee’s humidity and temperature swings require durable cabinet paint that can withstand daily use and environmental stress. Here’s what works best for Nashville kitchens.
Top Paint Types for Cabinet Surfaces
Oil-based paint has long been the gold standard for cabinets because it creates a hard, chip-resistant finish. However, oil-based paint requires longer drying time and produces strong fumes. It also yellows slightly over time, which can affect white cabinets.
Latex paint has improved significantly in recent years. High-quality latex paint dries faster than oil-based options, produces fewer fumes, and resists yellowing. Modern latex enamel paints deliver excellent adhesion and durability when paired with proper surface preparation.
Many professional painters recommend hybrid formulas like Benjamin Moore Advance or Sherwin-Williams ProClassic. These combine the durability of oil-based paint with the ease of cleanup and low odor of latex paint.
“The move toward low-odor latex and hybrid enamels is about more than convenience. The U.S. Environmental Protection Agency reports that paints and coatings can release volatile organic compounds into the air, with indoor levels of many VOCs running higher than outdoor levels – a real consideration when you’re painting inside a closed Tennessee kitchen.”
— U.S. Environmental Protection Agency (EPA)
Recommended Paint Finishes
Semi-gloss finish is the most popular choice for kitchen cabinets. It’s durable, easy to clean, and reflects light beautifully. Semi-gloss finish resists moisture and grease better than flat or eggshell finishes, making it ideal for high-traffic areas like kitchens.
Satin finish offers a slightly less shiny appearance while still providing excellent durability and ease of cleaning. Many Nashville homeowners prefer satin for a more contemporary look.
Avoid flat finishes on cabinets. They show every fingerprint and are difficult to wipe clean.
Primer Selection for Maximum Adhesion
Using a high-quality primer is essential for achieving a professional finish when painting kitchen cabinets. Primer improves adhesion to cabinet surfaces, helps block stains, and creates a smooth base for your top coat.
Zinsser primer products like B-I-N Shellac-Based Primer offer excellent adhesion to wood grain and laminate cabinets. For cabinets with existing finish or dark cabinets you’re painting white, use a stain-blocking primer to prevent bleed-through.
Some paint products like General Finishes Milk Paint require no sanding or priming, while Fusion Mineral Paint requires minimal sanding and no priming. However, most professional painters still recommend proper preparation for the longest-lasting results.
How Long Does Cabinet Painting Take in Nashville
The timeline for painting kitchen cabinets depends on the size of your kitchen, the condition of your cabinets, and whether you hire professional painters or tackle the job yourself.
Professional Cabinet Painting Timeline
Preparation phase: 1-2 days. Professional painters remove all cabinet doors, drawer fronts, and hardware. They clean cabinet surfaces thoroughly with a gentle grease remover, sand surfaces to create adhesion, and apply painter’s tape to protect walls and countertops.
Priming phase: 1 day. After surfaces are prepped, painters apply a high-quality primer to all cabinet boxes, doors, and drawers. The primer must dry completely before painting begins.
Painting phase: 2-3 days. Professional painters typically apply two coats of paint to achieve full coverage and a smooth finish. Each coat must dry before the next application. Lightly sanding between coats removes imperfections and promotes better adhesion.
Curing and reassembly: 3-5 days. While paint feels dry to the touch within hours, allowing adequate cure times of 21 to 30 days is crucial for the longevity of the paint finish. Most professionals wait at least 48-72 hours before reattaching hardware and cabinet doors to prevent damage.
Total professional timeline: 7-14 days from start to complete cure.
DIY Cabinet Painting Timeline
DIY projects typically take 2-4 weeks because homeowners can only work evenings and weekends. The painting cabinets process is time consuming and requires patience between coats. Many DIY painters underestimate how long proper prep work takes—and preparation is far more important than the actual painting for achieving a professional finish on kitchen cabinets.
Popular Cabinet Color Trends for Nashville Homes in 2026
Color choice significantly impacts your kitchen’s aesthetic. Here are the trending cabinet colors Nashville homeowners are choosing in 2026.
Timeless Whites and Neutrals
White kitchen cabinets remain the most popular choice because they create a fresh look that brightens kitchens and makes spaces feel larger. Benjamin Moore’s White Dove and Farrow & Ball’s Old White offer warm undertones that prevent stark, sterile appearances.
Greige (gray-beige) tones like Benjamin Moore’s Revere Pewter provide versatility and pair beautifully with both warm and cool accent colors.
Bold Statement Colors
Nashville homeowners are embracing color with deep navy blues like Benjamin Moore’s Hale Navy and rich greens like Greenwich Village. These colors add sophistication and work especially well on kitchen islands to create a striking contrast with white perimeter cabinets.
Burgundy and deep red tones are gaining popularity for homeowners who want warmth without traditional brown cabinetry. These colors pair beautifully with brass or gold hardware.
Two-Tone Cabinet Combinations
Mixing cabinet colors creates visual interest. Popular combinations include:
- White upper cabinets with navy or dark green lower cabinets
- Natural wood tones on the island with painted perimeter cabinets
- White cabinets with a bold color on the kitchen island
When choosing a color for your kitchen cabinets, select a shade that will stand the test of time. Most homeowners do not frequently repaint their cabinets, so picking a versatile color ensures your kitchen stays current for years.
The Professional Cabinet Painting Process
Understanding the step-by-step process helps you appreciate why professional painters deliver superior results compared to DIY attempts.
[The full ten-step professional sequence, from removing doors to final reassembly.]
Step 1: Remove Cabinet Doors and Hardware
Before painting kitchen cabinets, remove all drawers, cabinet doors, and cabinet hardware to create flat surfaces for painting. Label cabinet doors and drawer fronts with painter’s tape noting their location to make reassembly easier. Store hardware holes filled cabinet frames in labeled bags.
Step 2: Clean Cabinet Surfaces Thoroughly
Thoroughly degreasing surfaces is essential in preparing kitchen cabinets for painting. Kitchen cabinets accumulate grease and grime that prevent paint adhesion. Clean all cabinet surfaces with a degreaser like TSP or a gentle grease remover. Ensure cabinets are completely dry before moving to the next step.
Step 3: Sand for Better Adhesion
Sanding cabinet surfaces before painting creates a rough texture that allows the paint to adhere better, preventing future peeling or chipping. Use medium-grit sandpaper (100- to 150-grit) to scuff the existing finish. Focus on flat surfaces, but don’t forget detailed areas like cabinet frames and drawer fronts.
After sanding, wipe all surfaces with a tack cloth to remove dust and debris that could mar the finish.
Step 4: Fill Imperfections with Wood Filler
If your cabinets have nicks, dents, or hardware holes you want to relocate, fill these imperfections with wood filler. Once dry, sand smooth and wipe clean.
Step 5: Apply Primer to All Surfaces
Applying a high-quality primer is a critical step in the preparation process, as it lays the foundation for a successful paint job and improves adhesion. Use a brush for detailed areas and edges, then a roller or paint sprayer for flat parts.
Primer blocks stains, creates uniform absorbency, and helps prevent the wood grain from showing through paint. Allow the primer to dry completely according to manufacturer’s instructions.
Step 6: Light Sanding Between Coats
Lightly sanding between coats of primer and paint removes imperfections and promotes better adhesion. Use fine-grit sandpaper (220-grit) and a sanding block. Wipe surfaces with a tack cloth after sanding.
Step 7: Apply the First Coat of Paint
Start painting with a high-quality brush for edges and detailed work, then use a roller or paint sprayer for larger flat surfaces. Apply thin, even coats rather than one thick coat to avoid drips and brush strokes.
Using a durable, self-leveling enamel paint leads to a hard, chip-resistant finish on cabinets. Professional-grade paints from your local paint store deliver better coverage and durability than budget options.
Step 8: Apply the Second Coat
After the first coat dries, apply a second coat of paint using the same technique. Two coats ensure complete coverage and create a more even finish. Applying multiple thin coats of paint, rather than one thick coat, helps to achieve a more professional-looking finish on kitchen cabinets.
Some painters apply a clear top coat for extra protection, though this isn’t always necessary with modern enamel paints.
Step 9: Allow Proper Cure Time
Allowing adequate cure times, usually 21 to 30 days, is crucial for the longevity of the paint finish. While paint may feel dry, the chemical curing process continues for weeks. Avoid slamming cabinet doors or placing heavy items on shelves during this period.
Step 10: Reassemble and Clean Up
Once paint has cured sufficiently (at least 48-72 hours), carefully reattach cabinet doors using your labeling system. Install new hardware for an updated look, or clean and reinstall the existing cabinet hardware.
Why Professional Cabinet Painting Beats DIY
While DIY cabinet painting seems appealing, professional painters deliver results that justify the investment.
Expertise and Efficiency
Professional painters have painted hundreds of kitchens and understand how different cabinet surfaces respond to various paint products. They know how to avoid common issues like brush strokes, drips, uneven coverage, and premature peeling.
Professionals complete painting projects in 7-14 days, versus the 2-4 weeks DIY projects typically require. Their experience makes the process faster and less disruptive to your household.
Proper Equipment and Materials
Professional painters use commercial-grade equipment, including HVLP paint sprayers that deliver smooth, factory-like finishes impossible to achieve with brushes and rollers alone. They also have access to professional-grade primers and paints that aren’t available to consumers.
Guaranteed Results
When you hire professional interior painting services in Nashville, you receive a written guarantee backing the work. If issues arise, professionals address them quickly. DIY mistakes require complete repainting at your own expense.
Prep Work Represents 80% of Job Quality
The most important factor in cabinet painting success is proper preparation. Professional painters know that prep work represents 80% of the job quality when painting cabinets. They don’t cut corners on surface preparation because they understand it determines how well paint adheres and how long the finish lasts.
“Here’s the honest truth no cabinet brochure will tell you: the color is the easy 20%. The degreasing, sanding, priming, and cure time are the 80% that decides whether your kitchen still looks flawless in five years — or starts peeling at the handles in one.”
Maintaining Your Newly Painted Cabinets
After investing in cabinet painting, proper maintenance extends the life of your paint job.
Clean Gently and Regularly
Wipe cabinet surfaces with a soft cloth and mild dish soap diluted in water. Avoid abrasive cleaners or scrubbing pads that can damage the finish. Clean up spills and grease immediately to prevent buildup.
Protect from Moisture
Tennessee’s humidity can affect painted surfaces over time. Use exhaust fans when cooking to reduce moisture and grease in the air. Wipe up water splashes near the sink promptly.
Touch Up as Needed
Keep leftover paint for touch-ups. Minor chips and scratches are inevitable with daily use. Address them quickly to prevent moisture from getting under the paint film.
Avoid Harsh Chemicals
Don’t use ammonia-based cleaners or harsh chemicals that can dull or damage the finish. Stick to pH-neutral cleaners designed for painted surfaces.
Surprising fact
“Most homeowners are stunned to learn their cabinets aren’t fully hardened for up to a month. The paint feels dry in hours, but the enamel keeps curing for 21 to 30 days — which is why loading a shelf or slamming a door in week one can leave a permanent mark on a finish that looked completely done.”
Transform Your Nashville Kitchen with Professional Cabinet Painting
Cabinet painting offers Nashville homeowners an affordable way to refresh their kitchen and increase home value without the disruption and expense of full cabinet replacement. By understanding the process, choosing quality materials, and working with experienced professionals, you can achieve a beautiful, long-lasting finish that transforms your kitchen’s aesthetic.
Whether you’re preparing to sell your Nashville home or simply want to enjoy a more modern kitchen, professional cabinet refinishing delivers impressive results. From selecting the perfect paint color to applying durable finishes that withstand daily use, expert painters ensure your investment pays dividends for years to come.
“We treat every customer like family.”
— the principle behind PaintPro, founded by lifelong Nashvillian Ryan Ezzell and inspired by his grandfather’s fifty years of painting expertise, backed by Sherwin Williams materials and a 2-year written guarantee across Middle Tennessee.
Ready to transform your kitchen cabinets? Request your free estimate and discover why Nashville homeowners trust PaintPro for professional cabinet painting services throughout Middle Tennessee. Schedule your consultation today and take the first step toward your dream kitchen.